

Having a polished, easy-to-read CV is the most valuable weapon you may have in your job search toolkit since it will be the one that opens doors for interviews.
Using a border or horizontal line to divide portions of your resume might make reading easier for readers. This is also known as a horizontal ruler. The secret is to understand the proper approach to add lines in Word. Incorrect formatting might make your sentence uncomfortable or out of place, whether in print or digital media.
Why is it crucial to understand how to add a line in Word?
One of Word’s most helpful formatting tools is the ability to insert a line. Because lines help with organization and flow, they make the text easier to read or follow. You may also employ lines creatively to make your paper stand out more.
Here’s a step-by-step tutorial to help you look put together and professional.
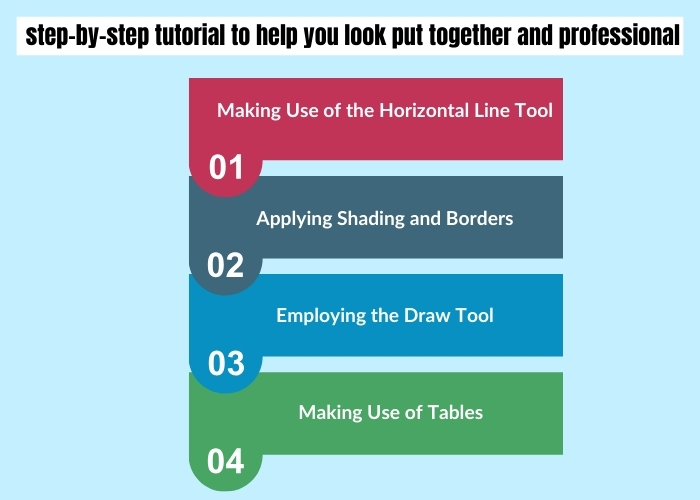
First Method: Making Use of the Horizontal Line Tool
Launch Word tWordew your resume:
Start by launching the Microsoft Word version of your résumé.
- Put the Cursor in Place:
- Wherever you wish to insert the line, point the cursor there. This usually occurs in between parts, like the one between your employment history and contact details.
- Add a Horizontal Line:
- Open the ribbon and select the “Home” tab.
- Click the “Borders” drop-down arrow in the “Paragraph” group.
- Then, choose “Horizontal Line.”
As a result, a horizontal line will be inserted at the cursor’s location. Modify the Line: Double-clicking the line will allow you to change its appearance. This causes the “Format Horizontal Line” dialogue box to open. You may modify the alignment, colour, width, and height from there.
Method 2: Applying Shading and Borders
Choose the Text:
To insert a line, highlight the text or paragraph above it.
- Entry Points and Shadowing
- Open the ribbon and select the “Home” tab.
- Click the “Borders” drop-down arrow in the “Paragraph” group.
- Click on “Borders and Shading.”
- Include a bottom border:
- Navigate to the “Borders” tab in the “Borders and Shading” dialogue box.
- Select “Bottom Border” from the menu.
- Change the line’s width, colour, and design to suit your needs.
- To apply the border, click “OK”.
This technique effectively divides the chosen text into portions by adding a line at the bottom.
Technique 3: Employing the Draw Tool
Open the Draw Tool here:
- Navigate to the ribbon’s “Insert” tab.
- Go to the “Illustrations” group and select “Shapes.”
- From the drop-down menu, choose “Line”.
Mark the Line:
- Click and drag the cursor to create a line over the chosen section.
- To maintain a straight line while sketching, use the “Shift” key.
Arrange the Line:
- Choose the queue.
- Select the “Format” tab from the ribbon when it displays.
- Change the colour, weight, and style of the line.
Way 4: Making Use of Tables
Put a Table in There:
- Move the pointer to the desired line location.
- Navigate to the ribbon’s “Insert” tab.
- Select a single-cell table (1×1) by clicking “Table”.
Modify the Table Borders:
- Click the table with a right-click menu and choose “Table Properties.”
- Navigate to the section “Borders and Shading”.
- Take out every border, leaving only the bottom border.
- As needed, change the bottom border’s width, colour, and style.
Table Resize:
- To make the table’s edges fit the width of your resume, drag them.
- To change the line’s thickness, you can also change its height.
Additional resume formatting advice

Here are a few more quick recommendations to improve your resume’s professional and readable appearance and boost your interview prospects.
Use a plain font: To make reading easier, choose a typeface that is clear and easy to read, like Times New Roman, Arial, or Calibri in sizes 11 or 12.
Highlight the headings: To make the page easy to navigate for recruiters, use extensive, bold writing for your headlines.
Remain brief: To guarantee that hiring managers will read your resume in its entirety, keep it to one or two pages.
Add some white space: Make sure your resume has enough padding, margins, and space so it doesn’t look crowded.
Emphasise crucial details: To highlight essential experiences, abilities, or accomplishments, use bold or italicised material.
Adhere to a standard format: To guarantee a professional appearance, ensure your resume’s formatting—including headings, bullet points, and spacing—is consistent throughout.
Edit and proofread: Verify your resume for problems in grammar, layout, and spelling to make sure it is polished and businesslike.
Employ a lucid framework: Arrange your content in a clear hierarchy to guarantee that the most crucial information is seen first.
FAQ:
Why would your resume need horizontal lines?
A straightforward yet efficient technique to organise your material into distinct sections on your resume is to include horizontal lines. This makes it easier for readers to peruse your resume because they can rapidly skim it and get the necessary information.
This increases the likelihood that a busy recruiter will read your resume in its entirety and choose you for an interview because they receive hundreds of resumes every day.
Does your resume need to contain horizontal lines?
On your resume, you are not required to use horizontal lines. Depending on the format and style, you may use different features to help divide the content.
These lines, however, can be a quick and efficient way to arrange your material when you adhere to the fundamental format and layout for your resume.
If you’d like to avoid horizontal lines, consider using lots of white space with bold titles between each part. The page will break and become more accessible for others to navigate as a result of this.
Can a Word document have a diagonal line added to it?
By drawing a line, you can add different types of lines, such as a diagonal line and horizontal and vertical lines. Go from the “Insert” tab to the “Shapes” menu. Select the choice for the diagonal line. Next, use the mouse to click and drag to adjust the diagonal line’s length.
In Word, can the colour of a line be altered?
After selecting the line, select “Format.” Click “More Outline Colours” to make your own, or choose a premade colour for the line. You can also adjust the thickness and create a line dashed or dotted in the “Format” section.
What more forms can you add to a Word document?
Numerous shapes can be added to a Word document. Select “Shapes” under the “Insert” menu to view all the choices. You can incorporate the following shapes in a document:
- Containers
- Triangles
- Rounds
- Arrowheads
- Rectangles with Curves
In summary
One straightforward approach to make your resume easier to read and more aesthetically pleasing in Microsoft Word is to add lines to it. Whether you want to utilize tables, border shading, the draw tool, or the horizontal line tool, these techniques can assist you in producing a resume that is neat, well-structured, and looks professional.