This blog’s content is intended solely for educational reasons. It is not advised to make Penicillin at home for medicinal purposes because of the possibility of contamination, inaccurate dosing, and low quality. Always seek the counsel and care of licensed healthcare professionals for medical issues. Alexander Fleming’s 1928 discovery of Penicillin, a ground-breaking antibiotic that efficiently treated bacterial infections, transformed medicine. Despite the advancements in modern medicine, survivalists and those who are interested in the process continue to be interested in the idea of making Penicillin at home. This is a rudimentary instruction explaining how one may hypothetically make Penicillin at home. Let’s talk about how to make Penicillin at home.
Supplies Required
- Citrus fruits or bread (or any meal that can easily mold)
- sterile containers
- distilled water
- a starch source (like potato pieces or cornmeal)
- a technique for preserving a comfortable, warm temperature range of 70–80°F (21–27°C).
- Test strips for pH
- Using cheesecloth or a fine sieve
- Sterilizing with alcohol
How to Make Your Penicillin

Step 1: Separating Bacteria from Penicillin
Place a slice of bread, a cantaloupe, or some citrus fruit in a container and place it in a dark, 70°F environment. It needs to be in a container that is closed but not airtight. To help retain moisture, it is helpful to put a few drops of water in the container and keep all but one corner closed.
The mold may take many weeks to begin forming. Ideally, you are not attempting to treat gangrene with your Penicillin because it is highly unlikely that you will obtain any viable spores before your patient passes away.
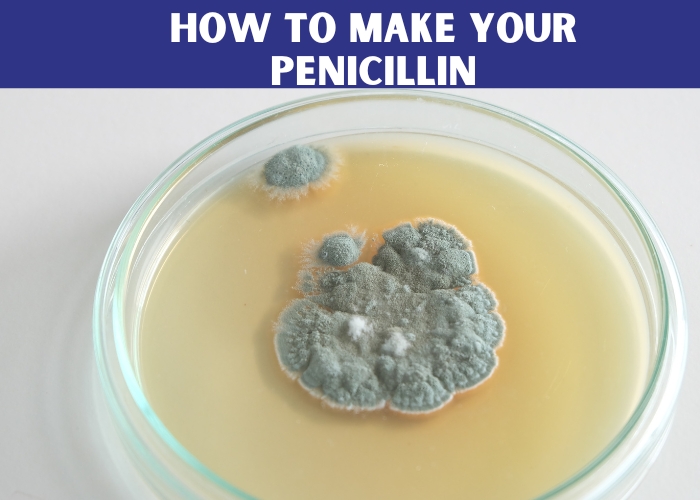
The fruit or bread will begin to develop grey mold. Eventually, the grey mold will turn bluish-green. It would help if you used this mold to make Penicillin.
Step 2: Culture the Penicillin Again
Penicillin is present in the greenish-blue mold you cultivated. Some people refer to this mold as “natural penicillin” and advise using it right away. Sadly, that isn’t the reality.
Is Ineffective:
- Rubbing Mould into a Wound: If bacteria has already entered the bloodstream, applying penicillin mold to the wound will not significantly aid in its treatment. However, it may be able to treat surface germs.
- Sipping Mould Tea: The Penicillin extracted from mold is extremely acid-sensitive. It will be eliminated before it reaches your bloodstream if you consume it as penicillin tea. Injecting this Penicillin is the only way for it to function (not recommended!).
Penicillin from mold needs to be further cultured in order to yield its benefits.
- Two hundred grams of peeled potatoes should be thinly sliced.
- Fill a 1-liter mason jar halfway full with distilled water and add the potatoes. Tightly screw on the lid. Place the entire jar in a boiling water pot. Simmer for thirty minutes.
- When it has slightly cooled, open the jar. Pour the contents through a cheesecloth; temporarily sterilized lace curtains can also be used. Seize the liquid! This is the “broth” you require.
- To the soup, add 20g of glucose, often known as dextrose. If glucose is not available, regular sugar will do.
- Pour in 20g of agar into the soup. If an agar is not available, plain gelatin (not Jelly) will work. Keep in mind that the agar won’t dissolve entirely. It’s alright.
- To make the entire volume one liter, add distilled water.
- Transfer the broth into large, level jars that have a fastening lid. Anything in general that could serve as a petri dish. Use your Petri dishes, if you have any!
- To stop airborne microorganisms from entering the dishes, cover them right away.
Step 3: Using Your “Petri Dish” Carefully
It’s time to transfer the mold spores of Penicillin to the “Petri dishes” containing the potato soup. Researchers have a highly specific procedure for cultivating cultures. We refer to it as “streaking.”
- Obtain a small length of wire. Twist the tip to form an oval.
- Use a flame to sterilize the wire’s tip. It ought to be scorching hot.
- To cool the potato soup (so the heat doesn’t kill your penicillin spores), dip the hot wire into it.
- Touch the wire tip to the penicillin mold, which is greenish-blue now.
- Divide the petri dish into three lines. The penicillin colonies will begin to expand at this point.
Step 4: Allow Penicillin to Proliferate
penicillin within a Petri plate
For around a week, cover and allow the Penicillin to develop in your homemade Petri plates.
Yellow is the color of Penicillin. But without a microscope and a skilled eye, it might be difficult to determine if you have penicillin-resistant bacteria because other species can also seem yellow.
Step 5: Let Your Penicillin Ferment

This is where things become more nuanced. For your penicillin spores to increase in large quantities, you must ferment them. If not, it will be similar to using a pail of water to put out a forest fire.
Most prep websites advise you to purchase a variety of strange chemicals, such as sodium nitrate and potassium monophosphate. That approach works, but when SHTF, I wonder if you’ll find such items lying about. This is a simpler penicillin fermentation process.
Crucial Points to Remember
- Sterility: In order to avoid being contaminated by dangerous bacteria or fungi, sterility must be maintained.
- Dosage: With the right lab equipment, it is practically easier to determine the appropriate dosage for homemade Penicillin.
- Effectiveness: Crude Penicillin’s effectiveness in treating all bacterial illnesses is unknown.
- Risks: If homemade Penicillin is not adequately purified and dosed, it may result in allergic responses or harmful effects.
In summary
Making Penicillin at home is an interesting notion, but it comes with risks and difficulties. The above-discussed method is quite simplistic and is not meant to be used for self-care. Strict regulatory guidelines are followed during the production of modern antibiotics to guarantee their efficacy and safety. Healthcare professionals should always be consulted for medical advice and treatment.

